Maquillage Professionnel: Smoky Eyes

30 Nov

Alas! The ever elusive smoky eye!

Do you know when the term “smoky eye” was coined?


*Jeopardy theme song*

*Jeopardy theme song*

Ding, ding, ding! Time’s up!


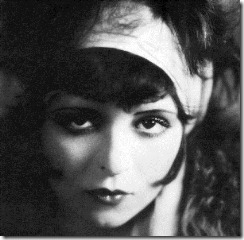
The 1920s! This was the flapper era when women were gaining more independence, and began experimenting with their clothes and makeup.

Clara-Bow-20s

Photo credit here

Clara Bow, one of the pioneers of the smoky eyes

Continue reading

Maquillage Professionnel: Maquillage du Jour (Day Makeup)

8 Oct

Day makeup can be described using two words- simple and natural. So please forgive me for my abundant use of those adjectives for this post!

After you have done Steps 18 of makeup application, you can easily skip to steps 10-12 and you would be good to go!

While there really are no rules for makeup, some guidelines in day makeup especially if you will be heading to school or to the office.

  • Foundation is optional! Conceal what needs to be concealed, and if you feel like that is enough, then it probably is! If needed, choose light, sheer foundation or tinted moisturizers to keep the look au naturale.
  • Stick to neutral colors. While there is nothing wrong with wearing colors during daytime (if you have what it takes, go for it, right?!), neutral colors are best for keeping things looking natural.  Go for light pinks, corals, peaches for your blush and lips. Nothing too dark, bright, or dramatic.

But of course, what fun would it be if there was no eye makeup involved, right?

Continue reading

Maquillage Professionnel: Maquillage du Soir (Night Makeup)

30 Sep

This is a first of the series of three different eye makeup techniques we learned during my makeup class.

There’s day makeup, night makeup, and smoky eye makeup. I decided to start of with my favorite, night makeup.

I’m going to focus on the face first:

Night time makeup for the face is all about… coverage, coverage, coverage.

  • Even though you might not necessarily need the coverage, you might want to reconsider given how unforgiving night time photography can be especially under different lights.
  • Stick to matte foundation coverage (it’s easy to add shimmer using bronzers and highlighters!) especially if you have oily skin.

Focus on one area

  • Want to show off those pouty lips? Keep everything else simple and bring out that va-va-voom red lipstick, instead!
  • Draw attention to those beautiful green, blue, or brown eyes by ensuring that those lips, cheeks look natural.

Let’s move to the eyes!!

Continue reading

Maquillage Professionnel: Steps 5-8

24 Sep

Here we go! The last four steps in creating a perfect canvass for makeup application!

5. Lift Concealer (Optional)

The next step after foundation is applying under eye concealer, one of the areas that are most difficult to conceal. However, if you are lucky and foundation can do the job, then skip this part.

If you are like me, then read up for some tips I learned…

  • If you have terribly dark under eye circles, counteract it with an orange color corrector. Blend well. (Step 3)
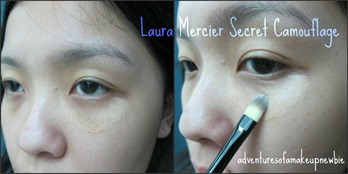
lm secret camouflage

  • Apply foundation over the corrector. Use light tapping motion so the corrector won’t smudge
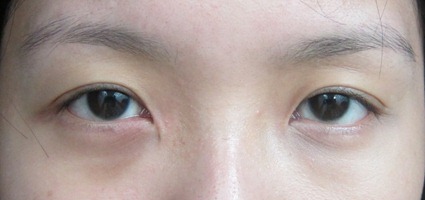
  • If foundation isn’t enough, use a liquid concealer to cover dark under eye circles. Why liquid? Because it’s easier to apply and will not tug delicate skin (i.e. your under eye area).
  • With the use of your concealer brush, dab the concealer on the OUTLINES of your eye bags.
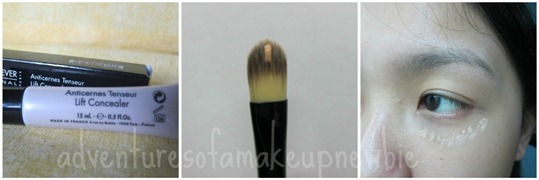
mufe lift

  • DO NOT put concealer over the eye bags to conceal it as this will only highlight the bags instead of concealing it.

See the difference?IMG_6155
 

6. Powder

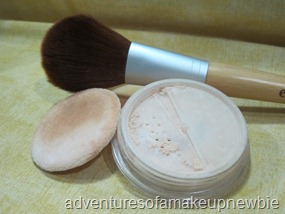
IMG_6068Powder is used for additional coverage and to set your corrector, foundation, and concealer.

To “seal in” foundation onto your skin, start of my putting some loose powder on your hand. Grab a powder puff, get some loose powder onto that puff, and gently tap the loose powder onto your face with the puff.

For additional coverage, use a powder brush or a kabuki brush; followed by the powder puff method to “seal” it in.

7. Contouring and Highlighting

I’ve started to love the effect of contouring your face to accentuate what we’ve naturally been blessed it- our cheekbones! The brilliant benefit of contouring is that even if we do not have the coveted oval face shape, we can contour to achieve a similar look.

Starting off with an angled brush (the MUFE 24S is incomparable amongst the different brushes I’ve tried- perfectly shaped to fit the hallows of our cheeks, just-right density to grab and deposit enough powder without looking muddy).

With a blush color 2-3 times darker than your skin tone, contour your face starting from outside your ear along hallows of your cheeks. Your contour should end on the same line as the outer corner of your eye.

You can also apply your contour shade at the bottom and sides of your nose, your temples, and your jawlines to make it look slimmer.

Highlight areas that the sun hits naturally- your nose, chin, right above the apples of your cheeks and your forehead. Use a shade that is 2-3 times lighter your skin tone.
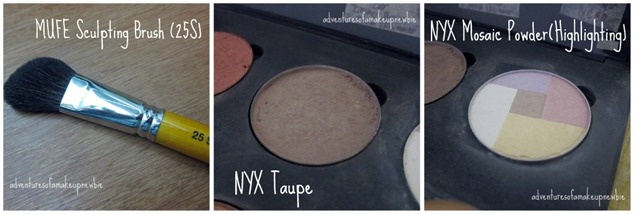
contour and highlight

I like using the MUFE Sculpting Kit #2 for this step. Is your wishlist growing and you feel your wallet getting tighter and tighter? Haha, no fret! Try NYX’s Blush in Taupe as a contour shade, and NYX’s mosaic powder in highlight as a highlighting shade as cheaper yet equally effective alternatives.

8. Eyebrows

Alas! The last step! Probably the most difficult one though, boo! But trust me, the results are absolutely worth it! Cleaning up and fixing your eye brows is like an instant facelift! It will also instantly make you look neat and polished. You can use the medium of your choice- pencil, powder, liquid, as for for color selection, remember a few tips from the pros:

  • Dark colored haired girls, use an eyebrow color 1-2 shades lighter than your hair color. Matching your natural hair color to your eyebrows would be too dark and look too harsh.
  • Light colored haired girls, use an eyebrow color 1-2 shades darker than your hair color.

Personally, I would NOT suggest attempting to shape your brows for the very first time. The risks are simply not worth the unknown result! If you under pluck, that’s fine, but if you over pluck, oh no! Brow hair takes a while to go back, so…

  • First time? Go to a professional! Get your eyebrows waxed or threaded by somebody who knows what they are doing!
  • Once you have a shape to follow, maintain it! Grab your tweezers weekly to remove stray hairs. This way, you wouldn’t have to hit the brow salon every 3-4 weeks to get it done!
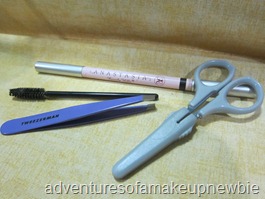
IMG_6156

Some tools you would need for your eyebrows:

  • Eye brow pencil, gel, powder
  • Mascara wand (get it from an old mascara)
  • Tweezers
  • Eye brow scissors


So there you have it! The first eight steps of makeup application! Master these steps and you can move on to the fun part- color! Blush, eye shadow, lipstick, oh my!
Maquillage Professionnel: Steps 1- 4

18 Sep

Day 1 of my personal makeup course focused on creating the perfect canvass for your makeup a.k.a. your face. There are eight steps in creating the base for your makeup. That’s right ladies and gents, you haven’t even gotten the chance to put color on your face yet and you’ve already gone through eight steps in makeup application. No fret however, as these steps are already pretty basic. The reason they break it down step-by-step is to make sure that we don’t forget one!

So I will break it down- steps 1-4, steps 4-8, eye techniques (step 9), and then steps 10-12.

Without further ado! 

1. Cleanse, tone, moisturize, sunscreen, etc.

Okay, this might already count as 3-4 steps, but basically, go through your normal skincare routine.

2. Prime

Applying primer is the first step in creating a smooth canvass for your face. Primer smoothes out your skin’s texture thus making corrector, concealer, foundation application easier.

MUFE has several primers available, to address an assortment of skin types.

primers

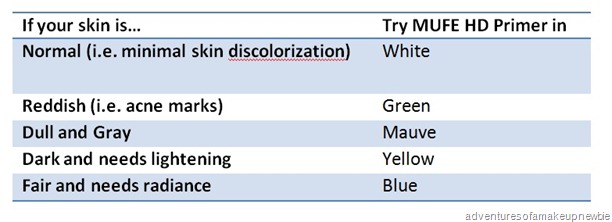
The MUFE HD Primers also come in several colors to answer different skin problems:

primer colors

Application:

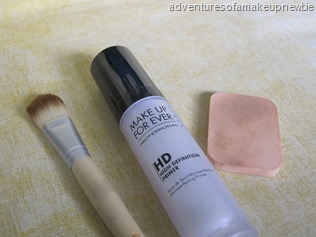
You can either use your hands or foundation brush for application, but they suggest using your foundation brush to spread it out more evenly. IMG_6049

USE SPARINGLY. You know that saying, “too much of a good thing can be a bad thing”? Well that totally applies to primer application. Applying to much primer would cause the product to build up on your skin which can end up looking like dead skin cells! Eeeewwww! Not a good way to start off in applying makeup, right?

Apply primer onto one area with your brush, followed by dabbing a clean sponge onto the same area to remove excess primer. To the same thing to other areas until entire face is complete.

Upper Right  (L-R): Ecotools Foundation Brush, MUFE HD Primer in 0, Sponge

Continue reading

Maquillage Professionnel: Class & Studio Intro

8 Sep

My Maquillage Professionnel Personal Makeup Course took place in the Modern Academy of Image, Culture and Arts (MAICA). It’s located in Burgos Circle, Taguig City.

I had a hard time finding the studio at first, so for those looking for it aimlessly (like I was!) look for Serenitea (popular tea chain in the Philippines). Go in. There is an elevator and a set of stairs that leads to MAICA. You’ll be greeted with this:

IMG_5903


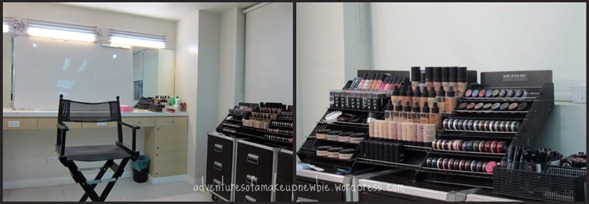
There are two studios in MAICA for classes, each studio is surrounded with mirrors along the wall with ideal makeup lighting to boot

studio


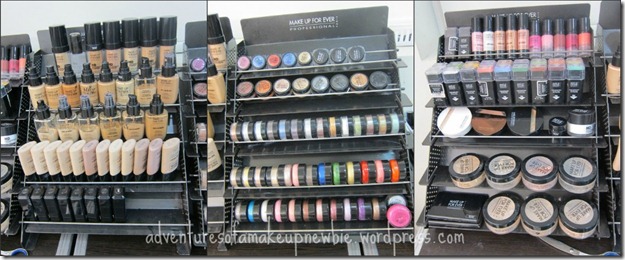
and equipped with countless MUFE products.

mufe products


I’ve attended four classes so far, tomorrow being our last one (boo!) Here’s our class outline:

Day 1: The Basics (Base, Foundation, Concealer, Contour, Eyebrows, Tools)

Day 2: Maquillage du Jour (Day Makeup and the “open banana” eye technique)

Day 3: Maquillage du Soir (Night Makeup and the “closed banana” eye technique)

Day 4: Smoky Eye

Day 5: Makeup for Photography

I’ve been having so much fun learning from the pros and I want to share and write so many ideas! Where should I start first? What would be interested in reading about first?

I will probably get to writing in-depth about each day but I need a starting point. Requests?

Maquillage Professionnel Personal Makeup Class

4 Sep

Late post! This was supposed to be posted last night but my Live Writer is acting up on me.

I am so so so excited! My Maquillage Professionnel Personal Makeup Class will start tomorrow!

It is a fifteen hour makeup class spread over 5 days (Monday to Friday, 6pm – 9pm) that covers everything a girl or guy needs to know about personal makeup application. Here’s what they have to say about it:

This course is designed for those who would like to create personal looks ranging from the most natural, no-make up look to high-glamour visage, looks with a fun, night-on-the-town appeal to a fresh girl-next-door look. Corporate executives and women in business and politics can benefit from an enhancement of their personal style through make up. Participants will benefit from advice on how to enhance their individual features. Consultations will be given on how to create a proper make up kit that suits each one’s individual style and lifestyle. Participants will delight in exploring different facets of their persona using professional make up artistry and skills with themselves as the subject. This is also an excellent venue for those considering an alternative career in professional make up artistry and would like to explore possibilities.

source

I am so happy that Deal Grocer had this deal again because the first time they offered this, I would be out of the country for all the class schedules available! Upon seeing this offer, I checked my scheduled ASAP and decreed that I will not be available for meetings/ travel for the entire week. The class has been written on my planner since July!

The class costs PhP 5700 (approx. $130), 40% off from the regular PhP 9500 (approx. $216). It sounds a bit pricey but to be honest, I was ready to pay the full price for the class after glowing recommendations from friends who attended this class (through the first Deal Grocer deal).

The class is fully supported by Makeup Forever which means… FREE USE OF MUFE PRODUCTS FOR THE ENTIRE CLASS!!! Well worth the price, right?!

I plan to blog extensively about this (mostly so I can keep track of what I learned as well). It’s a good thing we can bring our cameras to class!

So I am off to bed early since I have to get to work early so I can leave work early to get to class on time! 

  Night loves!